Jayco Precept Sway Bar Bracket Upgrade Guide: JRide Plus Worth It?
Read full question
Honestly not sure if this is actually needed or just another way to get more cash out of me. I mean, the JRide Plus already has beefier sway bars than stock, so are the brackets really the weak link here? Would love to know if this upgrade is actually worth doing or if I'm fine sticking with what I've got.
Quick Answer
Upgrading sway bar brackets on a Jayco Precept with JRide Plus can provide better stability and reduce stress on mounting points, but it's not always necessary. The upgrade is most beneficial if you're experiencing bracket flex or have added significant weight to your RV.
The Quick Answer
For your 2020 Jayco Precept 31U with JRide Plus suspension, upgrading to larger sway bar brackets is typically beneficial but may not be absolutely necessary since you already have larger-than-stock sway bars. The shop's suggestion likely comes from the fact that adding a rear track bar and Safe-T-Steer increases chassis rigidity, which can put additional stress on the existing sway bar mounting points. Larger brackets distribute this load better and reduce the risk of bracket failure or mounting point damage. Given that you've already invested in suspension upgrades, the bracket upgrade would be a logical next step, typically costing $200-400 (rough ballpark — actual cost varies by region, brand, and model year and changes over time, so get current quotes) for parts and labor.
What's Causing This
Your JRide Plus system already includes beefier sway bars than standard RV suspension, but the mounting brackets may still be the factory units designed for lighter loads. When you add a rear track bar and Safe-T-Steer system, you're creating a more rigid chassis connection that transfers forces differently throughout the suspension system. This increased rigidity means the sway bar brackets now experience higher stress loads during cornering and road irregularities.
The stock brackets on your Precept 31U were designed for the original suspension loads, not the enhanced forces created by your upgraded suspension components. Larger brackets provide a bigger mounting footprint, often with additional reinforcement welds or thicker steel construction. This becomes especially important on Class A motorhomes like yours where the leverage forces are significant due to the vehicle's size and weight distribution.
Additionally, bracket failure is one of the more common suspension issues on heavily loaded RVs, and replacing a failed bracket on the road is much more expensive and inconvenient than upgrading proactively. The shop likely sees this as preventive maintenance based on your other upgrades.
Tools You'll Need
If you decide to tackle this upgrade yourself, you'll need a comprehensive set of tools since you'll be working under the chassis. Start with a quality floor jack rated for your RV's weight and heavy-duty jack stands for safety. You'll need a complete socket set including deep sockets, as sway bar bracket bolts are often recessed. A torque wrench is essential for proper installation to manufacturer specifications.
Additional tools include penetrating oil for dealing with potentially corroded fasteners, a wire brush for cleaning mounting surfaces, and possibly a die grinder if any bracket modifications are needed. Safety equipment is crucial: safety glasses, work gloves, and proper lighting for working underneath the vehicle. You may also need thread locker compound for the new installation and anti-seize compound for future maintenance.
Consider having backup plans ready, such as knowing where to get replacement hardware if bolts break during removal, which is common on 4-year-old vehicles that have seen road salt and weather exposure.
Step-by-Step Fix
Before starting, ensure your RV is on level ground with the parking brake engaged and wheels chocked. Jack up the front end and secure it on jack stands, never relying solely on the jack for support.
Locate the existing sway bar brackets where they mount to the frame rails. Take photos before disassembly to ensure proper reassembly orientation. Apply penetrating oil to all bracket bolts and allow it to work for 15-20 minutes. Before removing any components, ensure suspension load is relieved by having the vehicle weight supported on jack stands with wheels hanging free. Remove the sway bar end links first, then carefully remove the bracket mounting bolts. Support the sway bar to prevent it from falling and causing injury - the sway bar will drop slightly once the brackets are removed.
Clean all mounting surfaces thoroughly with a wire brush, removing any rust or corrosion that could affect the new bracket fit. Compare the new brackets to the old ones, noting any differences in bolt patterns or mounting orientations. Install the new brackets using the hardware provided, following the manufacturer's torque specifications exactly.
Reconnect the sway bar end links, ensuring they're not binding or twisted. Before lowering the RV, double-check that all fasteners are properly tightened and that the sway bar moves freely through its range of motion. Test drive at low speeds initially to verify everything feels normal before returning to highway speeds.
When to Call a Pro
Given that you've already had professional work done on your suspension system, it would be wise to have the same shop handle the bracket upgrade. They're familiar with your specific setup and can ensure compatibility with your existing JRide Plus system, rear trac bar, and Safe-T-Steer components. Professional installation typically runs $150-250 for labor, which is reasonable considering the safety implications.
Call a professional immediately if you notice any signs of current bracket stress or failure, such as cracking around the mounting points, loose sway bar connections, or unusual handling characteristics. These symptoms indicate the brackets are already overloaded and could fail completely.
Also consider professional installation if you're not completely comfortable working under a large RV or lack the proper safety equipment. Sway bar bracket failure while driving can cause sudden loss of vehicle control, making this a critical safety component. The peace of mind from professional installation, including warranty coverage, often justifies the additional cost on a vehicle as valuable as your Precept 31U.
Tools & Supplies You'll Need
 Jack Boss 3 Ton Low Profile, Aluminum and Steel Racing Floor Jack with Dual
Lifts the chassis for tire and suspension work. View on Amazon →
Jack Boss 3 Ton Low Profile, Aluminum and Steel Racing Floor Jack with Dual
Lifts the chassis for tire and suspension work. View on Amazon →
 BIG RED T43202 Torin Heavy Duty Steel Jack Stands: 3 Ton (6,000 lb) Capacity
Hold the rig up safely once it is lifted. View on Amazon →
BIG RED T43202 Torin Heavy Duty Steel Jack Stands: 3 Ton (6,000 lb) Capacity
Hold the rig up safely once it is lifted. View on Amazon →
 CRAFTSMAN 230 Pcs Mechanics Tool Set, Socket Wrench Set, Car Tool Kit with
A broad SAE/metric socket-and-ratchet set covers most RV fasteners. View on Amazon →
CRAFTSMAN 230 Pcs Mechanics Tool Set, Socket Wrench Set, Car Tool Kit with
A broad SAE/metric socket-and-ratchet set covers most RV fasteners. View on Amazon →
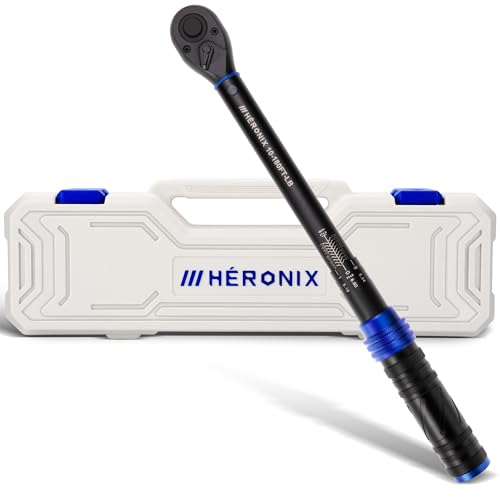 HERONIX 1/2 Inch Drive Click Torque Wrench, 10–180 Ft.Lb/13.6–244.0 Nm
Click-type wrench for lug nuts and anything with a torque spec. View on Amazon →
HERONIX 1/2 Inch Drive Click Torque Wrench, 10–180 Ft.Lb/13.6–244.0 Nm
Click-type wrench for lug nuts and anything with a torque spec. View on Amazon →
Still need help? Ask an RV Mechanic
Get a personalized answer from a verified RV mechanic. Describe your specific issue and get step-by-step help for your rig.
Related Repair Guides
- Ford E-Series (E350/E450) RV Chassis: Complete Guide
- Ford F53 Chassis Complete Guide: Maintenance & Troubleshooting
- RV Flat Tire on Highway: Emergency Steps & Specialized Roadside Service Tips
- Ford F53 Harsh Ride Fix: Shocks, Springs & Sway Bars
- RV Tires & Wheels: Complete Maintenance & Safety Guide
- Ford E350 Dually Wheel Center Hole Size Guide: Front vs Rear Differences Explained
- Dutchstar Chassis Cracking Noise: Diagnosis & Repair Guide
- 2003 Ford F53 Wheel Bearing Grease: Best Products
- F53 Hydroboost Brake System Problems: Complete Repair & Troubleshooting Guide
- F53 Death Wobble DIY Fix: $20 Panhard Bar Solution
Need More Help?
Try our free RV calculators and tools to help diagnose and plan your repairs.
Browse RV ToolsWeight calculator, electrical planner, propane estimator & more
