Fix LED Tail Light Problems on a Workhorse RV Chassis
Read full question
First, my turn signal indicators are flashing extremely slowly - almost like they're struggling to work properly. Second, when I turn on my running lights or tail lights, the indicators stop flashing altogether and just stay on solid, which obviously defeats the purpose of having turn signals. Third, and perhaps most concerning, when I press the brake pedal, my main tail/brake lights actually turn OFF instead of getting brighter, leaving only the center high-mounted brake light working.
I made sure to match the wiring exactly - the stop/tail lights have 3 wires each, and the reverse/indicator lights have 2 wires each, just like the original incandescent bulbs. The connections seem solid and I followed the same wire routing. I'm wondering if this is a common issue with LED conversions on Workhorse chassis, and what specific components or modifications I need to make this work properly. What's the complete solution to fix these LED tail light problems?
Quick Answer
LED tail lights on Workhorse cause slow flash or solid indicators. Fix with LED-compatible flasher relay, load resistors, and dedicated ground wires for each light.
Short Answer
Your R-vision Condor on the Workhorse chassis is experiencing classic LED compatibility issues with the factory lighting system. The slow flashing indicators, solid turn signals with tail lights on, and brake lights going off when pressed are all symptoms of load resistance problems and potential ground sharing issues. You'll need to install load resistors for the turn signals and check for shared ground circuits that are causing the brake light feedback. This is a common problem when upgrading incandescent bulbs to LEDs on older RV chassis without updating the flasher relay and addressing ground sharing.
Understanding the Problem
Your Workhorse chassis was designed for incandescent bulbs that draw much higher current than LEDs. The turn signal flasher relay expects to see a specific electrical load - when it doesn't detect enough current draw from the LED bulbs, it flashes slowly or not at all. This explains your slow indicator flashing problem.
The solid turn signals when your tail lights are on indicates a ground sharing issue common in older RV wiring. Your 3-wire stop/tail/turn combination lights likely share a common ground with other circuits, creating unwanted electrical paths. When the tail lights are energized, current is finding its way back through the turn signal circuit via this shared ground.
The most puzzling issue - brake lights going off when you press the pedal - suggests your brake light circuit is incorrectly wired or there's a ground loop causing current to flow backwards. This could be dangerous as your rear brake lights aren't functioning properly. The high-level brake light working normally indicates the brake switch itself is fine, but there's likely a wiring problem specific to the rear lamp circuits.
These problems are interconnected and stem from the electrical characteristics differences between incandescent and LED technology, combined with the way Workhorse chassis typically wire their rear lighting circuits with shared grounds and combined functions.
What You'll Need
For the turn signal load issue, you'll need two load resistors (correct part for your model - verify with dealer). These typically cost $15-25 (rough ballpark — actual cost varies by region, brand, and model year and changes over time, so get current quotes) each and need to be mounted securely with good heat dissipation. You'll also want a multimeter for testing circuits and some basic electrical supplies.
WARNING: Load resistors generate significant heat during operation and can reach temperatures of 300-400°F depending on wattage. They must be mounted securely to metal surfaces with adequate ventilation and away from any combustible materials to prevent fire risk.
To address the ground sharing problems, gather marine-grade heat shrink connectors, 14-gauge automotive wire in black, red, and amber colors, and dielectric grease for connections. A wiring diagram for your specific Workhorse chassis year would be invaluable - these are often available from Workhorse or your RV dealer.
You may also need an electronic LED-compatible flasher relay to replace the thermal flasher unit. Look for a heavy-duty electronic flasher rated for your RV's electrical system, typically around $25-40. Some mechanics also recommend installing a trailer wiring isolator module to completely separate the circuits.
Basic tools needed include wire strippers, crimpers, electrical tape, and possibly a test light or circuit tracer to follow the problematic wiring paths. Budget about $100-150 for all components if doing the work yourself.
How to Fix It
First, verify that your tail lights are actually LED bulbs and confirm their polarity is correct before proceeding. Then start with the turn signal load resistors since this is the most straightforward fix. Install one load resistor parallel to each rear turn signal circuit. Mount these resistors securely to metal chassis components for heat dissipation - they get very hot during operation. Connect the resistor in parallel with the LED circuit - resistor positive to the turn signal wire and resistor negative to the ground wire at the same connection points as the LED. This should restore proper flashing speed.
SAFETY WARNING: Always disconnect battery power before working on electrical circuits. Load resistors become extremely hot during operation and must be mounted away from wiring, plastic components, and any flammable materials.
Next, address the ground sharing problem. Locate where your rear lamp grounds connect - likely at a common grounding block near the rear of the RV. Using your multimeter, check for continuity between different lamp circuits when they shouldn't be connected. You may need to run dedicated ground wires for each lamp function rather than relying on shared chassis grounds.
For the brake light issue going backwards, carefully trace the brake light circuit from the brake switch forward. Check that the brake light wire isn't somehow connected to a ground when the brake pedal is pressed. This often happens when someone has incorrectly tapped into wiring or when a ground wire has broken and is creating an alternate path through another circuit.
Consider replacing the thermal flasher relay with an electronic LED-compatible unit. This is usually located in the fuse box under the dashboard. The new electronic flasher will work properly with the lower current draw of LED bulbs and may resolve the turn signal issues without needing load resistors, though the ground sharing will still need addressing.
Test each repair step individually before moving to the next. After installing load resistors, test turn signals. After fixing grounds, test the brake/tail light interaction. This systematic approach helps identify if you've resolved each specific problem.
Leave It to the Experts
If tracing the shared ground circuits becomes overwhelming or you're not comfortable working with 12V RV electrical systems, this repair is well within the scope of most RV service centers or automotive electrical shops. A qualified technician can typically diagnose and repair these LED conversion issues in 2-4 hours.
Expect to pay $200-400 for professional diagnosis and repair, depending on how extensive the rewiring needs to be. Many RV dealerships are very familiar with Workhorse chassis lighting issues and can often provide specific solutions for your R-vision Condor model year.
The brake light safety issue makes this repair somewhat urgent - having non-functional brake lights is dangerous and likely illegal. If you can't tackle this repair immediately, consider temporarily reinstalling one of your old incandescent brake bulbs until you can get the LED system working properly.
Some specialty RV electrical shops offer LED conversion services that include all necessary modifications upfront. While more expensive initially, this can save headaches and ensure everything works correctly together. They'll typically provide a warranty on their electrical work, giving you peace of mind for your lighting system. Professional installation also ensures that load resistors are properly mounted with adequate heat management and that all electrical connections meet safety standards for RV applications.
Tools & Supplies You'll Need
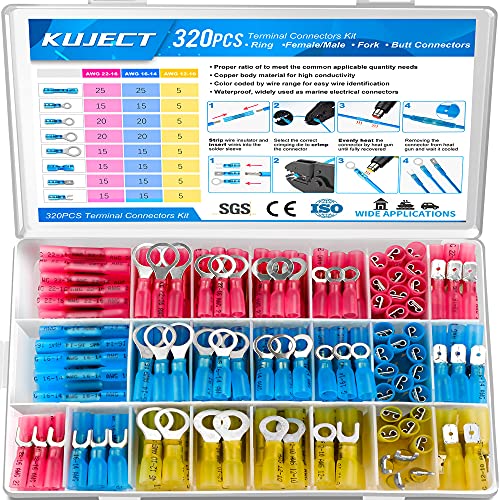 Kuject 320PCS Heat Shrink Wire Connectors Kit, Electrical Waterproof Crimp
Waterproof solder-seal connectors — the right fix for RV vibration and moisture. View on Amazon →
Kuject 320PCS Heat Shrink Wire Connectors Kit, Electrical Waterproof Crimp
Waterproof solder-seal connectors — the right fix for RV vibration and moisture. View on Amazon →
 AstroAI Digital Multimeter and Analyzer TRMS 6000 Counts Volt Meter Ohmmeter
Reads volts, continuity, and resistance — the #1 tool for tracing 12V faults. View on Amazon →
AstroAI Digital Multimeter and Analyzer TRMS 6000 Counts Volt Meter Ohmmeter
Reads volts, continuity, and resistance — the #1 tool for tracing 12V faults. View on Amazon →
Still need help? Ask an RV Mechanic
Get a personalized answer from a verified RV mechanic. Describe your specific issue and get step-by-step help for your rig.
Related Repair Guides
- RV Chassis Battery Draining & Dead Outlets - Troubleshooting
- RV Backup Camera Not Working? Complete Troubleshooting Guide
- RV Electrical Problems: 12V & 120V Troubleshooting Guide
- ECM Low Battery Warning RV: Complete Diagnosis & Fix Guide
- Protect Your RV Alternator When Charging Lithium
- RV Shore Power Not Working: Complete Troubleshooting Guide
- How to Repair a Hole in RV Grey Water Tank
- No 12 Volt Power in RV: Complete Troubleshooting Guide
- RV DC Electrical System: Expert Guide to 12 Volt Systems
- RV 12V Lights Dimming: Complete Troubleshooting Guide
Need More Help?
Try our free RV calculators and tools to help diagnose and plan your repairs.
Browse RV ToolsWeight calculator, electrical planner, propane estimator & more
