Convert RV Pull Light Switches to Toggle Switches
Read full question
Before I start tearing into the dash wiring, I want to make sure I understand the proper approach for this conversion. I'm particularly concerned about getting the wire connections right and ensuring the new toggle switches can handle the electrical loads properly. The current pull switch seems to control both lighting circuits, so I assume I'll need to separate those functions when I wire in the individual toggles.
What's the correct procedure for converting from a single pull switch to dual toggle switches for headlights and marker lights? I want to make sure I don't create any electrical issues or damage anything in the process.
Quick Answer
Converting pull switch to toggles is straightforward. Label all wires, match switch ratings to circuit loads, and wire power to both switches with separate outputs for markers and headlights.
What's Going On
Gordon, replacing your 2001 Monaco Knight's pull switch with two separate toggle switches is absolutely doable and a great upgrade that many RV owners have successfully completed. The slight drag you're experiencing is a clear sign that the internal contacts are wearing out, and switching to individual toggles will give you better control and reliability. This modification is moderately difficult but well within the capabilities of most DIY RV owners with basic electrical skills. You'll be working with 12V DC circuits, so it's much safer than household wiring, and the Monaco Knight has good access to the dash area compared to some coaches.
The original pull switch likely controls both your headlights and marker lights through a single multi-position mechanism. By splitting this into two toggles, you'll have independent control over each lighting circuit, which is actually an improvement over the factory setup. Most RV owners who've done this conversion report it takes about 2-3 hours and costs around $30-50 for quality marine-grade toggle switches.
Why This Happens
Pull switches in RVs from the early 2000s often develop drag issues because they're handling relatively high amperage loads for extended periods. Your Monaco Knight's headlights and marker lights combined can draw significant current, and that constant switching under load wears down the internal contacts and spring mechanisms. The plastic components also become brittle over time, especially with the temperature swings common in RV dashes.
These original pull switches were often cost-cutting measures by manufacturers, using automotive-grade components that weren't really designed for the marine environment that RVs experience. Salt air, humidity changes, and vibration all contribute to premature wear. The drag you're feeling may be from corrosion on the contact surfaces or worn detent springs that no longer provide smooth operation.
Additionally, Monaco coaches from this era used a lot of shared switching circuits to save on wiring complexity, which means your single pull switch is doing the job that really should be handled by separate switches. This puts extra stress on the mechanism and makes failure more likely over time.
Getting Ready
SAFETY WARNING: Before beginning any electrical work, disconnect your coach batteries to prevent short circuits or electrical shock.
Before starting this project, you'll need to identify exactly what circuits your pull switch controls and trace the wiring. Start by removing the dash panel around the switch area - Monaco Knights typically use plastic clips and a few screws. Take photos before disconnecting anything, as the wire colors and positions will be crucial for your new installation. You'll want to test each wire with a multimeter to confirm which ones power the headlights versus marker lights.
For parts, get two high-quality marine-grade toggle switches rated for at least 15 amps at 12V DC. Avoid cheap automotive switches from big box stores - go with brands like Blue Sea Systems, Carling, or Cole Hersee that make proper marine switches. You'll also need ring terminals, heat shrink tubing, and possibly some additional wire if the existing leads aren't long enough to reach your new switch locations. Plan to spend around $40-60 on quality components.
Essential tools include a multimeter, wire strippers, crimping tool, drill with appropriate bits for mounting the new switches, and basic hand tools for removing dash panels. Make sure you have a good LED flashlight or headlamp since you'll be working in tight spaces behind the dash. Most importantly, locate your coach batteries and know how to disconnect them - you'll want the 12V system completely off while doing this work.
Walking Through the Fix
Start by disconnecting your coach batteries and removing the dash panel to access the back of the pull switch. Before disconnecting anything, identify and note the fuse ratings for these lighting circuits in your fuse panel. Carefully document the existing wiring with photos, then use your multimeter to identify which wires go to headlights, marker lights, and power feed. Monaco Knights often use a red wire for 12V power feed, though wire colors can vary by model year, with different colored wires going to each lighting circuit.
Remove the old pull switch and determine where you want to mount your two new toggles. Many owners choose to use the original switch hole for one toggle (verify the hole size matches your toggle switch requirements) and drill a new hole nearby for the second. Make sure you have adequate clearance behind the dash for the switch bodies. When drilling, use a step bit to prevent cracking the plastic, and always drill from the front face to avoid chipping.
Wire each toggle switch individually - one side gets the 12V power feed (typically the red wire), and the other side connects to the respective lighting circuit. Use proper ring terminals and heat shrink all connections. The headlight circuit will likely be a heavier gauge wire since it draws more current than the marker lights. Test each switch individually before reassembling everything.
Before buttoning everything up, reconnect your batteries and test both switches thoroughly. Check that your headlights work independently, marker lights work independently, and both can operate simultaneously without issues. Verify that the combined current draw doesn't exceed your original fuse ratings. Make sure no other lights are affected by your modification - sometimes these circuits also control dash lighting or other accessories.
Beyond DIY Territory
If you discover that your pull switch controls more than just headlights and marker lights - such as interior lighting, step lights, or other accessories - the wiring becomes significantly more complex. Monaco coaches sometimes used these switches to control multiple circuits through relays, and modifying that setup requires advanced electrical knowledge and possibly additional relay boxes.
Call a professional if you find evidence of previous electrical modifications, burned wires, or if the existing wiring doesn't match standard Monaco color codes. Some owners have attempted repairs that create safety hazards, and sorting out modified wiring is best left to someone with RV electrical experience. Also, if your coach has been rewired for LED lighting conversions, the current draws may be different than expected.
Consider professional help if you're not comfortable working with the fuse box or main electrical panel, as some Monaco Knights have the lighting circuits protected by breakers that may need adjustment. Additionally, if you want to add features like dimming capability or integrate with existing multiplex systems, that's definitely professional territory requiring specialized knowledge of Monaco's electrical architecture.
Tools & Supplies You'll Need
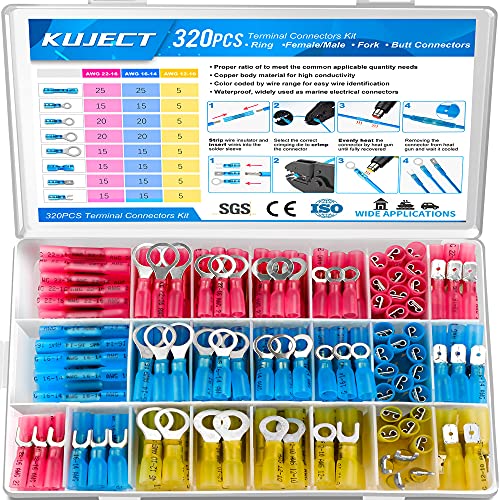 Kuject 320PCS Heat Shrink Wire Connectors Kit, Electrical Waterproof Crimp
Waterproof solder-seal connectors — the right fix for RV vibration and moisture. View on Amazon →
Kuject 320PCS Heat Shrink Wire Connectors Kit, Electrical Waterproof Crimp
Waterproof solder-seal connectors — the right fix for RV vibration and moisture. View on Amazon →
 PULITUO'S 20V Cordless Drill/Driver, Electric Screwdriver - 2 Batteries
Drives screws and bores holes all over the rig. View on Amazon →
PULITUO'S 20V Cordless Drill/Driver, Electric Screwdriver - 2 Batteries
Drives screws and bores holes all over the rig. View on Amazon →
 WINAMOO Automotive Test Light with 3-48V LED Digital Voltage Display, Auto
Quick 12V power/ground check with no batteries to fuss with. View on Amazon →
WINAMOO Automotive Test Light with 3-48V LED Digital Voltage Display, Auto
Quick 12V power/ground check with no batteries to fuss with. View on Amazon →
Still need help? Ask an RV Mechanic
Get a personalized answer from a verified RV mechanic. Describe your specific issue and get step-by-step help for your rig.
Related Repair Guides
- RV Chassis Battery Draining & Dead Outlets - Troubleshooting
- RV Backup Camera Not Working? Complete Troubleshooting Guide
- RV Electrical Problems: 12V & 120V Troubleshooting Guide
- ECM Low Battery Warning RV: Complete Diagnosis & Fix Guide
- Protect Your RV Alternator When Charging Lithium
- RV Shore Power Not Working: Complete Troubleshooting Guide
- How to Repair a Hole in RV Grey Water Tank
- No 12 Volt Power in RV: Complete Troubleshooting Guide
- RV DC Electrical System: Expert Guide to 12 Volt Systems
- RV 12V Lights Dimming: Complete Troubleshooting Guide
Need More Help?
Try our free RV calculators and tools to help diagnose and plan your repairs.
Browse RV ToolsWeight calculator, electrical planner, propane estimator & more
