RV Toilet Won't Hold Water: Fix Bowl Drainage & Sewer Smells
Read full question
Before I start tearing things apart, what's usually the culprit here? And roughly what am I looking at cost-wise for parts? Really hoping this is one of those DIY fixes and not a "call the RV guy" situation.
Quick Answer
An RV toilet that won't hold water usually has a faulty ball seal, blade seal, or toilet valve. Most issues can be fixed by cleaning or replacing the seal assembly, which typically costs $15-30 and takes about an hour.
The Quick Fix
What if that disgusting sewer smell wafting through your RV could be eliminated in under 30 minutes with a simple seal replacement?
Your Toolkit
- Rubber gloves
- Toilet paper or rags
- Flashlight or headlamp
- Bowl cleaner or mild soap
- Replacement seal kit (if needed)
- Screwdriver set
- Pliers (possibly)
- RV toilet seal lubricant
How to Fix It
- Turn off water supply to the toilet and flush to empty the bowl completely. Safety first: Turn off electricity to any electrical toilet components before beginning work. Ensure adequate ventilation when working with sewer connections.
- Inspect the toilet type: Dometic toilets typically have either a ball seal (round mechanism) or blade seal (flat mechanism) at the bottom of the bowl.
- Check for visible debris: Look into the bowl opening for toilet paper, waste, or mineral buildup around the seal area.
- Clean the seal area: Remove any visible debris carefully with gloves. Use a toilet brush or rag to clean around the seal thoroughly.
- Test the seal mechanism: Press the foot pedal or flush handle to open and close the valve several times. Listen for proper operation and watch for smooth movement.
- Inspect the seal itself: If cleaning doesn't work, remove the toilet from the floor (typically 2-4 bolts) to access the seal assembly underneath.
- Replace the seal if damaged: Remove the old seal assembly, clean the mounting area, and install the new seal with a thin layer of RV toilet seal lubricant for proper sealing.
- Reassemble and test: Reinstall the toilet, turn water back on, fill the bowl, and monitor for several hours to ensure the fix worked.
Understanding the Issue
The ball seal, blade seal, or valve mechanism isn't creating a proper seal, allowing water to drain and sewer gases to escape. This is typically fixed by cleaning debris from the seal area or replacing the seal assembly.
Debris buildup: Toilet paper, waste particles, or mineral deposits prevent the seal from closing completely. This is the most common cause and often the easiest fix.
Warped or cracked seals: Over time, rubber seals deteriorate from chemicals, heat, and normal wear. A warped ball seal or cracked blade seal won't maintain a water barrier.
Misaligned components: If the toilet has been removed for repairs or the RV has experienced significant bouncing, the seal assembly may be misaligned.
Worn valve mechanism: The spring-loaded mechanism that operates the seal may weaken over time, preventing full closure.
Leave These to the Experts
Contact an RV service technician if you discover cracked toilet flanges, damaged floor around the toilet base, or if the black water tank itself appears to be leaking. Also call a professional if you're uncomfortable removing the toilet from the floor or if multiple attempts at seal replacement haven't resolved the issue.
Long-Term Care
Use RV-specific toilet paper that dissolves quickly to prevent debris buildup. Add a small amount of water to the bowl after each use to keep seals moist. Avoid harsh chemical cleaners that can damage rubber components. Inspect and clean the seal area monthly during heavy use periods. Consider using RV toilet seal conditioner quarterly to extend seal life.
Tools & Supplies You'll Need
 Supmedic Medical Nitrile Exam Gloves, Latex-Free, Powder-Free, Food Safe
Disposable gloves for greasy and chemical jobs. View on Amazon →
Supmedic Medical Nitrile Exam Gloves, Latex-Free, Powder-Free, Food Safe
Disposable gloves for greasy and chemical jobs. View on Amazon →
 Amartisan 10-Piece Magnetic Screwdrivers Set, 5 Phillips and 5 Slotted Tips
Phillips, flat, and Torx tips for panels, trim, and appliances. View on Amazon →
Amartisan 10-Piece Magnetic Screwdrivers Set, 5 Phillips and 5 Slotted Tips
Phillips, flat, and Torx tips for panels, trim, and appliances. View on Amazon →
 Flashlights High Lumens Rechargeable, 100,000LM LED Super Bright Flash Light
Bright rechargeable light for bays and undercarriage. View on Amazon →
Flashlights High Lumens Rechargeable, 100,000LM LED Super Bright Flash Light
Bright rechargeable light for bays and undercarriage. View on Amazon →
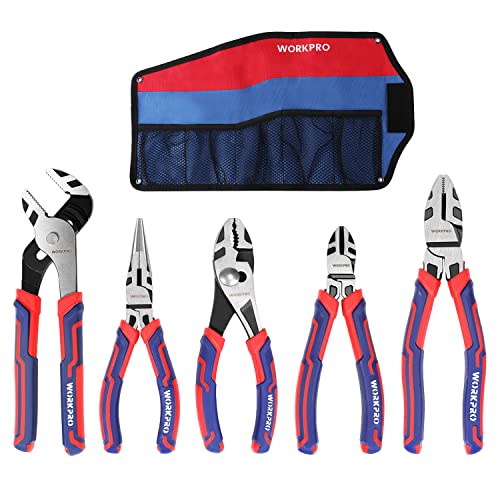 WORKPRO Pliers Set, Premium Cr-V Construction, Includes 6 Inch Slip Joint
Slip-joint, cutting, and groove-joint pliers in one set. View on Amazon →
WORKPRO Pliers Set, Premium Cr-V Construction, Includes 6 Inch Slip Joint
Slip-joint, cutting, and groove-joint pliers in one set. View on Amazon →
Still need help? Ask an RV Mechanic
Get a personalized answer from a verified RV mechanic. Describe your specific issue and get step-by-step help for your rig.
Related Repair Guides
- RV Water Pump Losing Prime: Troubleshooting & Winterization
- Monaco Diplomat Rear Air Suspension Won't Dump Fully - Troubleshooting Guide
- Camco Rhino Sewer Hose Adapter Pro: Complete Review & Installation Guide for RV Owners
- Dometic 310 Toilet Leaking at Foot Pedal: Complete Fix Guide
- RV Grey Water Tank Clogged? 7 Proven Solutions to Clear Blockages Fast
- RV Black Tank Not Holding Full Capacity: 7 Common Causes and DIY Repair Solutions
- RV Winterization: Complete Step-by-Step Guide
- Fix RV Low Water Pressure on City Connection: Troubleshooting Pump Assembly
- How to Fix RV Fresh Water Tank Leaks: Complete Diagnosis & Repair Guide
- RV Water Pump Runs But No Water? Troubleshooting Guide
Need More Help?
Try our free RV calculators and tools to help diagnose and plan your repairs.
Browse RV ToolsWeight calculator, electrical planner, propane estimator & more
